Showing posts with label recipe. Show all posts

Tuesday, November 29, 2011

The help and That Chocolate Pie...Minnie's Chocolate Pie.


This year I celebrated my first thanksgiving...I had no idea what the heck to make besides a Shepherd's Pie and a chocolate pie but not just any chocolate pie! - Minnie's chocolate pie. So I googled and I found this Minny's Chocolate Pie...is this really THE recipe? who the hell knows! but I googled the recipe after I bought what I thought the recipe would use - which sadly was nothing I bought except the frozen dough pie crust. So naturally I was like this BIG FROWNY FACE...then I rant about why we have to live out in the middle of nowhere. Thankfully the great thing about baking is you can always substitute ingredients and still get a pretty amazing result!

So here is my easy as pie not fancy but what you would find in your fridge/pantry recipe for Chocolate pie.

1 frozen short crust pie crust (FYI I don't know what it is about the stater bros pie crust but I dislike it greatly! its kinda too salty...)
about 3oz mini semi sweet chocolate chips
3 tablespoons of salted butter 
2 cups of french vanilla half and half
2 large eggs beaten

preheat your oven to 350F centre rack. * as you make the filling its a good idea to pre bake or "dry out" your pie crust. Do whatever you want to prevent a soggy bottom!
In a bowl over a pot of boiling water, place the choc chips and the butter, using a hand whisk mix it as it melts. Then add a dash of the half and half, mix well and continue to slowly add the half and half mixture into the chocolate while whisking ( don't just dump it in all at once or too fast as the chocolate will start to solidify!) til it is combined and silky. Beat your eggs in a separate bowl then slowly whisk in your chocolate mixture. Place crust onto a baking tray that can hold a bit of water. then fill your crust, place in oven then pour hot water into the baking tray. bake til firm but wobbly in the centre at about 25mins you will want to check. the last thing you want is a souffled custard pie! Be careful removing the tray from the oven, the gently remove the pie from the tray and cool thoroughly before chilling.

 Ant and I don't really have anyone out here so we invited a couple of his marine buddies who like us were stranded and our closest neighbours. We got the biggest turkey we could find 24lbs of birdy goodness to be exact. Seriously I didn't think we would have enough food besides the turkey but damn we were so stuffed, we didn't even get to dessert. But damn that pie was delicious when we finally got to taste it!

Best ever no fail chocolate chip cookies!


My personal recipe which I adapted from Martha Steward's Chocolate Chunk Cookies
makes appox. 3 dozen cookies
1 cup all purpose flour
1 cup self raising flour
3/4 cup granulated sugar
1/2 cup packed brown sugar
2 teaspoons vanilla extract
1 large egg
16 tablespoons (1 cup) of salted butter/unsalted plus 1 tablespoon of salt
Half a bag each of mini semi sweet choc chips and heath toffee bits
Preheat your oven to 350F,
Whisk or sift your flours together in a bowl. In a seperate bowl cream butter and the sugars til pale and fluffy, whisk in egg and vanilla extract til combined on low then mix in the flour in two parts til just combined (do not over mix!) Lastly mix in the choc chips and toffee.
Spoon 2 tablespoons of batter on to a non stick or greased tray. 1.5inches apart so bout 6 cookies on your standard size baking tray. Flatten them a bit in rounds then pop into your oven for about 10-13 mins til the edges turn golden brown. Left sit about a min or two on tray before removing on to cooling rack. Its ok if the cookies seem to stick a bit as the toffee bits make the bottom a little sticker when hot.
I use salted butter spread cos thats what my hubby prefers to buy, which is ok cos you wont need to add extra salt to your mix. Also using both plain and self raising flours minuses the need for baking soda or baking powder which is handy if you have neither!
Another handy trick for perfectl evenly sized cookies is to use a measuring spoon and leveling it off. Its quick and easy!

Thursday, August 11, 2011

Matcha Kasutera

            The perfect sponge has always eluded me, often over cooked or undercooked or with huge air cavities...with the little matcha I had left, I really wanted something nice that would go with my leftover koshian cream - A bit of a fancy slice with cream in the middle! I heard a genoise sponge would better suit my purpose, however the japanese dessert book I have uses a Kasutera like sponge for layered desserts. Half the recipes I found seperated eggs, the other half did not. Not sure what the difference would be if you chose to do it that way...but I went for not seperating the eggs. You simply beat them up with grandulated sugar over a pot of hot water (to thoroughly combine sugar and eggs) til it's all pale, fluffy and mousse like (30-40mins)! Then add a mixture of honey and milk while whisking (NOT beating, use a hand whisk) before whisking in one tablespoon at a time of flour. It's tedious and gets harder and harder but you won't have any flour pockets which is extremely important to create the dense light nature of the kasutera. A baked Kasutera should be spongey and spring back when pushed down on. The recipe says to seal in plastic and cool in the fridge - I hope it won't be soggy!! I feeling quite fatigued tonight so it's bed time for me with my fingerscrossed that my Kasutera will be well like a Kasutera - moist and light like a cloud!

You an find the recipe here @ Just Hungry
* I mixed and sifted my matcha with my flour, otherwise if you want to flavour you could try different types of honey.

On a side note seeing as I have appox. 6wks left in Perth, I'm teaching my mum how to make macarons. It's tough finding powdered flavourings and colourings here so I'm going to dry some sugar free kool aid - they're so vabriant colourwise and I'm hoping the flavour will come through in the shell. I googled to see if others have attempted this with no luck...so we shall see - I'm hoping for success as there are even less ingredients you can find out in our area Yucca Valley...Stay tuned folks!

Tuesday, August 9, 2011

Macarons...


So today I made the macaron shells...I suppose my heat wasn't 100% even in my oven, T_T resulting in some cracked shells bordering some decent looking macarons. I am going to try again tomorrow for 2 reasons - 1. I have a lot of koshian cream leftover and 2. my strive for perfection. But with one less egg white and they will petite sized macarons instead!

Here are some pics of today...
Add your sugar slowly at slow speed. when
 I get a few ripples I stop and swap to my whisk.
Til I get this...stiff shiny glossy peaks. STOP!
Don't over beat. I whisk and check a lot when I'm close.
Add to your powder mix and fold 50 strokes max.
Fill your piping ball, I used a big star nozzle cos
I don't have a plain one but it's ok cos it smooths up.

Like so :) rap & tap your pan to release the big
bubbles then let it sit for an hour whilst preheating your oven.

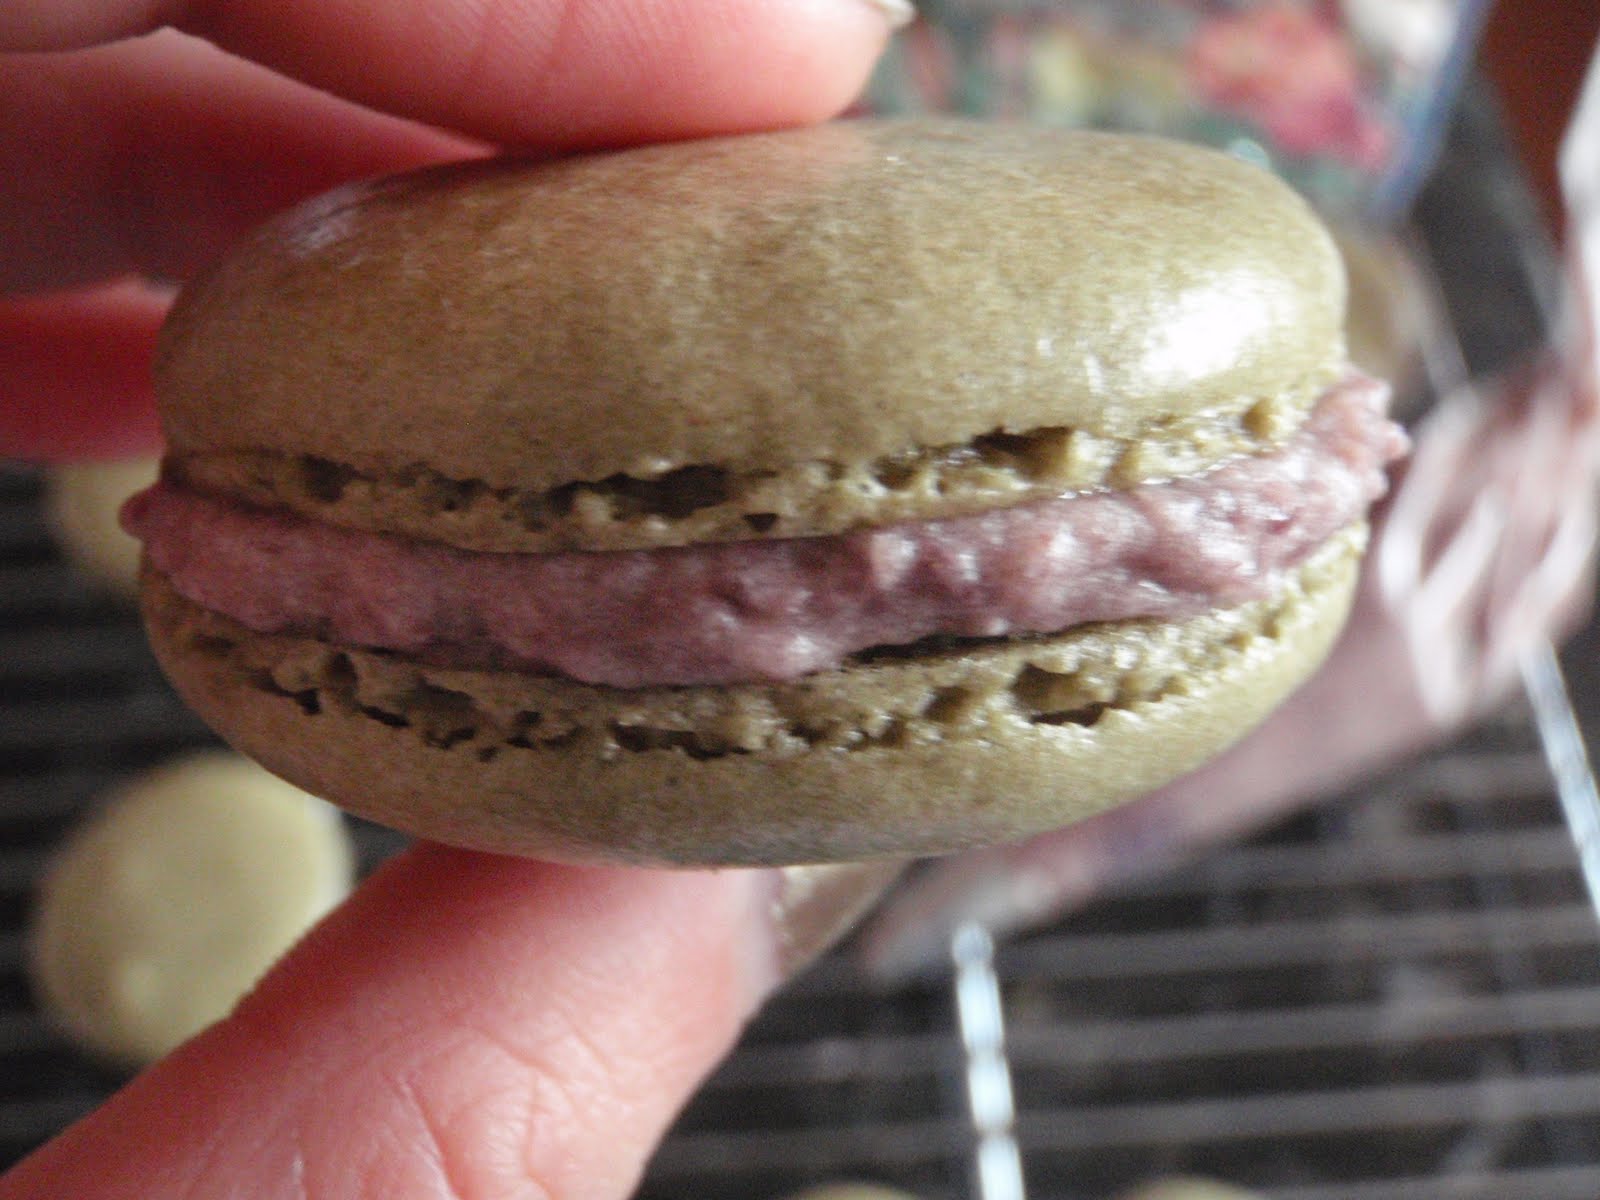
 They took about 14-16mins to cook cos they were bigger. Cool them and pipe your cream on! They taste better overnight in the fridge but if you don't have paitence like me, have a nice mug of bitter black tea or matcha and a macaron(or 2 or 3 or 4...they are too good!).
In hindsight I would've used less cream but I was using a whatever was leftover in the carton and didn't want to leave the most useless lil bit in the fridge, but it makes for a very light sweet chewy treat all round so I didn't mind.

Monday, August 8, 2011

Mad about Macarons!


          The other day I decided to make a cake, after a long absence from the kitchen. Inspired but the current anime I was watching at the time Yumeiro Patissiere, I grabbed my Japanese small cakes and tarts book flipped through and invented my own delightful layered cake. Layers of soft whipped cream  with stewed mandarins and Japanese egg custard filling sandwiched between 4 layers of heavenly soft sponge cake made the Japanese style without butter! 

*I whipped my cream using a hand whisk with the cream in a bowl on ice - it is easier and you don't over whip and split your cream. esp handy tip for summer!

         After my success of my mandarin layered cake I ventured on to make a Green tea pound cake with the matcha my mum was nagging me to use - It was a disaster!!
         My first mistake was in measurements the recipe called for 2 sticks of butter...no big deal right? Well it was in US measurements where 1stick of butter is 110g...over here in Aus a stick of butter is 250g...It turned my cake into a delicious butter pound cake instead! T_T
Not that it would've matter because the matcha was more grandulated than powdered and never blended into the batter anyway! I still got compliments on the cake which was the lightest most moist butter cake I've ever tasted, not to mention most of the excess butter melted out of the cake so I simply rested the cake on a piece of kitchen paper as it cooled.
        After that I couldn't stop thinking about baking with matcha powder...hmmm...should I make another pound cake? then it hit me. Macarons. I had made them once before, petite strawberry macarons with a dark chocolate & strawberry ganache, they looked so cute bottled up as sweet treat christmas gifts. I have been itching to try again, they were pretty easy the first time round except I might've added a bit too much dry mix and it was very hard to pipe. This time I am more prepared, I have googled extensively and can't wait til I make them tomorrow!

Korean Matcha/Nokcha powder
             So today I preped, It took me 4 Japanese/Korean supermarkets to find the matcha powder - the colour, aroma and texture of it is totally different to the one my mum bought from Japan! I guess the other one was more for beverages than cooking. Anyways you have to age your eggwhites 24-48hrs at room temp this makes it easier to create your meringue base, I am using a recipe that uses a French meringue base rather than the Italian method which uses hot sugar syrup. I always use a metal bowl and squeeze lemon juice on to the whisk or beaters, rinse and dry before using to remove any grease that may prevent my egg whites from becoming stiff! I used to over whip too so now I beat to soft peaks and manually whip till I reach stiff peaks. The other day I whipped 8 eggwhites for my sponge sheet cakes using a whisk - I would not recommend it at all... My arm felt like it was going to fall off...

Mix your powdered sugar, matcha & almond meal

*If you are unsure which method of meringue to go for visit this handy site. Also My Lemony Kitchen is an interesting read, she gives a personal insight to using all 3 types of meringues (French, Italian & Swiss).

Then sift it and pulse any chunky bits (don't waste expensive ingredients!)
 then sift it again atleast twice! I sifted 3 times.

I measured and prepared all my ingredients for tomorrow so I won't be stopping to find anything, I would recommend it!
However I am using a different recipe for Green tea Macarons

Green Tea Macarons from Trangs kitchen adapted from Food je t'aime who adapted her recipe of Tartlette ^_^

INGREDIENTS:110 gm blanched almond flour (I usually buy almond flour in Whole Food Market)
200 gm minus 1 1/2 tbsp. confectioners’ sugar
1 1/2 tbsp matcha powder
100 gm egg whites (from about 3 eggs), aged at room temperature for 24-48 hours
50 gm granulated sugar


Directions
1. Sift the confectioners' sugar, almond flour and matcha powder for several times
until blended. In a clean large bowl, beat the egg whites on high speed until foamy.
Gradually add the granulated sugar and continue beating until a smooth,
shiny meringue with stiff peaks forms. Add the ground almond mixture
to the meringue bowl all at once, then quickly but gently fold together using
a wide rubber spatula until no streaks remain (fold for about 50 strokes). You want to achieve a
thick batter that ribbons or flows from the spatula when lifted. And when you draw a line in the batter by your stapula, the batter will come together after you count from 1 to 5.

2. Line two baking sheets with silicone baking mats or parchment paper. Transfer the batter to a
piping bag fitted with a plain wide round tip. Pipe into small rounds on the prepared baking sheets, spaced about 2 inches apart. Let sit at room temperature for about an hour to develop a hard shell.

3. Preheat the oven to 300 degree F. Bake for 8-10 minutes, depending on size. Transfer the pans to a
wire cooling rack and let cool completely before moving the cookies.


*Now I read somewhere that cooked cookies should come off the sheet even before they are completely cooled and that you should bake at subsequent 1-2min blocks monitoring very carefully...:P I guess I will find out tomorrow!

Koshian(adzuki) filling
I am using Yumi's recipe from the delectable hodgepodge well kind of... lol

Adzuki beans (they are actually deep red but my LED makes it look colourful!)
Ingredients
3/4 cup dried adzuki beans
3/4 cup castor sugar
3 3/4 cup water

mini crockpot(slow cooker)
Wash and drain adzuki beans, put in small crockpot with 3 3/4 cups of water and cook til soft. I cooked it for about 5hrs then strained most of the liquid out. Process the beans to a thick smooth paste and transfer to a pot, add the sugar and some liquid if too thick. Cook over low heat til it sticks to your wooden paddle - stir constantly to prevent burning. I took it off the heat a lil before it reached the consistency I wanted as it will lose water cooling down and thicken up even more.
It looked like this off the stove..
And becomes like this...
Make sure the paste is completely cool.
Then whip your cream (appox. 3/4 cup double/thickened/whipping cream) to stiff peaks and fold with your Koshian to combined.
Then...TASTE IT!! ^_^ oishi ne!