Tuesday, August 9, 2011

Macarons...


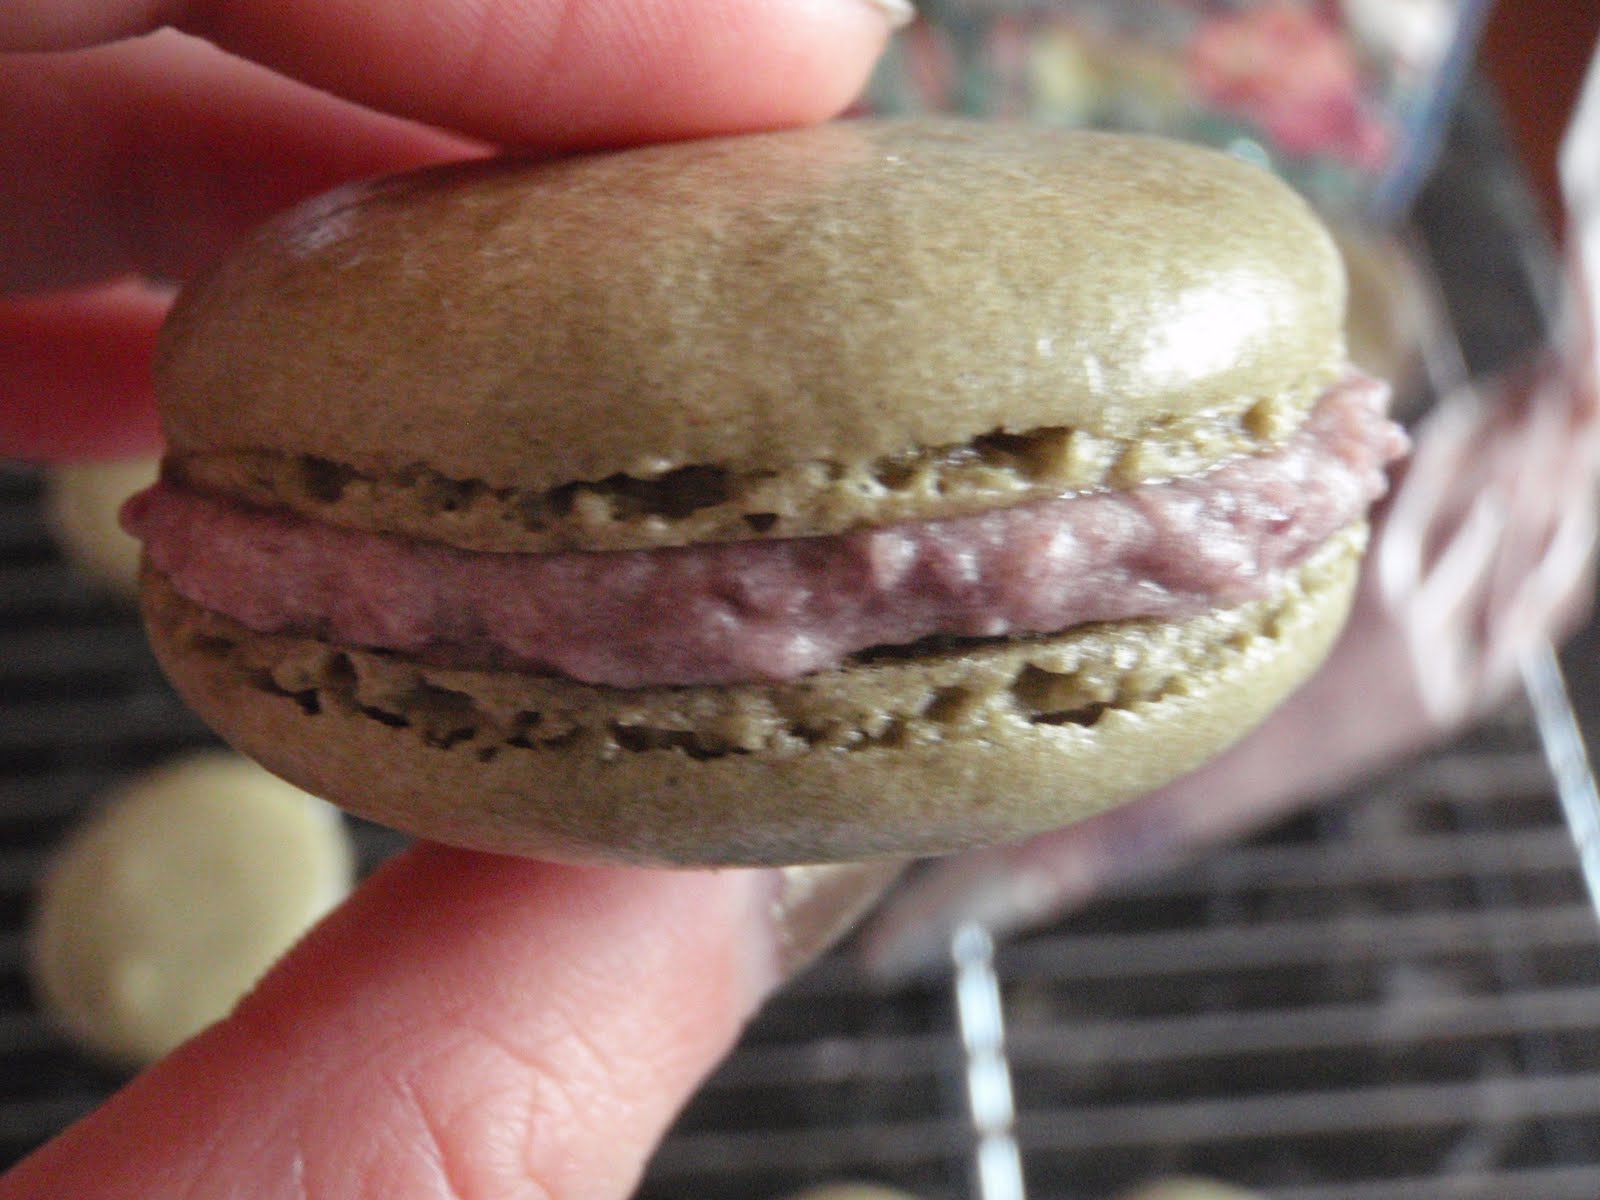
So today I made the macaron shells...I suppose my heat wasn't 100% even in my oven, T_T resulting in some cracked shells bordering some decent looking macarons. I am going to try again tomorrow for 2 reasons - 1. I have a lot of koshian cream leftover and 2. my strive for perfection. But with one less egg white and they will petite sized macarons instead!

Here are some pics of today...
Add your sugar slowly at slow speed. when
 I get a few ripples I stop and swap to my whisk.
Til I get this...stiff shiny glossy peaks. STOP!
Don't over beat. I whisk and check a lot when I'm close.
Add to your powder mix and fold 50 strokes max.
Fill your piping ball, I used a big star nozzle cos
I don't have a plain one but it's ok cos it smooths up.

Like so :) rap & tap your pan to release the big
bubbles then let it sit for an hour whilst preheating your oven.

 They took about 14-16mins to cook cos they were bigger. Cool them and pipe your cream on! They taste better overnight in the fridge but if you don't have paitence like me, have a nice mug of bitter black tea or matcha and a macaron(or 2 or 3 or 4...they are too good!).
In hindsight I would've used less cream but I was using a whatever was leftover in the carton and didn't want to leave the most useless lil bit in the fridge, but it makes for a very light sweet chewy treat all round so I didn't mind.

Monday, August 8, 2011

Mad about Macarons!


          The other day I decided to make a cake, after a long absence from the kitchen. Inspired but the current anime I was watching at the time Yumeiro Patissiere, I grabbed my Japanese small cakes and tarts book flipped through and invented my own delightful layered cake. Layers of soft whipped cream  with stewed mandarins and Japanese egg custard filling sandwiched between 4 layers of heavenly soft sponge cake made the Japanese style without butter! 

*I whipped my cream using a hand whisk with the cream in a bowl on ice - it is easier and you don't over whip and split your cream. esp handy tip for summer!

         After my success of my mandarin layered cake I ventured on to make a Green tea pound cake with the matcha my mum was nagging me to use - It was a disaster!!
         My first mistake was in measurements the recipe called for 2 sticks of butter...no big deal right? Well it was in US measurements where 1stick of butter is 110g...over here in Aus a stick of butter is 250g...It turned my cake into a delicious butter pound cake instead! T_T
Not that it would've matter because the matcha was more grandulated than powdered and never blended into the batter anyway! I still got compliments on the cake which was the lightest most moist butter cake I've ever tasted, not to mention most of the excess butter melted out of the cake so I simply rested the cake on a piece of kitchen paper as it cooled.
        After that I couldn't stop thinking about baking with matcha powder...hmmm...should I make another pound cake? then it hit me. Macarons. I had made them once before, petite strawberry macarons with a dark chocolate & strawberry ganache, they looked so cute bottled up as sweet treat christmas gifts. I have been itching to try again, they were pretty easy the first time round except I might've added a bit too much dry mix and it was very hard to pipe. This time I am more prepared, I have googled extensively and can't wait til I make them tomorrow!

Korean Matcha/Nokcha powder
             So today I preped, It took me 4 Japanese/Korean supermarkets to find the matcha powder - the colour, aroma and texture of it is totally different to the one my mum bought from Japan! I guess the other one was more for beverages than cooking. Anyways you have to age your eggwhites 24-48hrs at room temp this makes it easier to create your meringue base, I am using a recipe that uses a French meringue base rather than the Italian method which uses hot sugar syrup. I always use a metal bowl and squeeze lemon juice on to the whisk or beaters, rinse and dry before using to remove any grease that may prevent my egg whites from becoming stiff! I used to over whip too so now I beat to soft peaks and manually whip till I reach stiff peaks. The other day I whipped 8 eggwhites for my sponge sheet cakes using a whisk - I would not recommend it at all... My arm felt like it was going to fall off...

Mix your powdered sugar, matcha & almond meal

*If you are unsure which method of meringue to go for visit this handy site. Also My Lemony Kitchen is an interesting read, she gives a personal insight to using all 3 types of meringues (French, Italian & Swiss).

Then sift it and pulse any chunky bits (don't waste expensive ingredients!)
 then sift it again atleast twice! I sifted 3 times.

I measured and prepared all my ingredients for tomorrow so I won't be stopping to find anything, I would recommend it!
However I am using a different recipe for Green tea Macarons

Green Tea Macarons from Trangs kitchen adapted from Food je t'aime who adapted her recipe of Tartlette ^_^

INGREDIENTS:110 gm blanched almond flour (I usually buy almond flour in Whole Food Market)
200 gm minus 1 1/2 tbsp. confectioners’ sugar
1 1/2 tbsp matcha powder
100 gm egg whites (from about 3 eggs), aged at room temperature for 24-48 hours
50 gm granulated sugar


Directions
1. Sift the confectioners' sugar, almond flour and matcha powder for several times
until blended. In a clean large bowl, beat the egg whites on high speed until foamy.
Gradually add the granulated sugar and continue beating until a smooth,
shiny meringue with stiff peaks forms. Add the ground almond mixture
to the meringue bowl all at once, then quickly but gently fold together using
a wide rubber spatula until no streaks remain (fold for about 50 strokes). You want to achieve a
thick batter that ribbons or flows from the spatula when lifted. And when you draw a line in the batter by your stapula, the batter will come together after you count from 1 to 5.

2. Line two baking sheets with silicone baking mats or parchment paper. Transfer the batter to a
piping bag fitted with a plain wide round tip. Pipe into small rounds on the prepared baking sheets, spaced about 2 inches apart. Let sit at room temperature for about an hour to develop a hard shell.

3. Preheat the oven to 300 degree F. Bake for 8-10 minutes, depending on size. Transfer the pans to a
wire cooling rack and let cool completely before moving the cookies.


*Now I read somewhere that cooked cookies should come off the sheet even before they are completely cooled and that you should bake at subsequent 1-2min blocks monitoring very carefully...:P I guess I will find out tomorrow!

Koshian(adzuki) filling
I am using Yumi's recipe from the delectable hodgepodge well kind of... lol

Adzuki beans (they are actually deep red but my LED makes it look colourful!)
Ingredients
3/4 cup dried adzuki beans
3/4 cup castor sugar
3 3/4 cup water

mini crockpot(slow cooker)
Wash and drain adzuki beans, put in small crockpot with 3 3/4 cups of water and cook til soft. I cooked it for about 5hrs then strained most of the liquid out. Process the beans to a thick smooth paste and transfer to a pot, add the sugar and some liquid if too thick. Cook over low heat til it sticks to your wooden paddle - stir constantly to prevent burning. I took it off the heat a lil before it reached the consistency I wanted as it will lose water cooling down and thicken up even more.
It looked like this off the stove..
And becomes like this...
Make sure the paste is completely cool.
Then whip your cream (appox. 3/4 cup double/thickened/whipping cream) to stiff peaks and fold with your Koshian to combined.
Then...TASTE IT!! ^_^ oishi ne!


The last 4 months...

        I keep saying to myself "I gotta update my blog", I'm not sure if anyone really reads it...but I never got around to doing it. Anyway boy has it been a crazy past couple of months! I gained a hubby and we somewhat set up our lil house in Yucca Valley (Ant got posted to Twentynine Palms) and adopted our lil Jackabee puppy I affectionately named Wallaby (Wally for short). After spending much needed time with my man I returned back to Perth to organise the BIG move (NOT FUN!), whilst knitting and experimenting using koolaid to dye wool yarn. 10 knitted projects later I swapped the needles for a whisk and spatula, a much needed break for my wrists!

So here goes my life for the last 4 months in pictures!

                                                          1 husband and a dog later..
we drove...
387miles to the Grand Canyon, Arizona
and another 855miles to Boise, Idaho
Naturally the boys were pooped!
We camped, fished and 3-wheeled for a week before driving 664miles to

                                           
  Las Vegas!


A week later and I was back in Perth T_T
but I have been busy!

  1. my 1st pair of socks!

2 & 3. Snowflake Fingerless Gloves by Chris O'Brien


4. Big Herringbone Cowl by Purl Soho

5.Fruity Mug Cosies with my koolaid dyed merino,Button Up your Cup by Julie Tarsha

Friday, April 8, 2011

Autumn/Winter knits 2011

As the snow melts in the north, the wind starts to blow down here in the south. I wish we could say we got more rain but today is blue as can be after the slight rainy/cloudy/windy autumn weather we had yesterday. So begins autumn in Australia, time to think about new woolies to knit. First up "Caprifoglio" by Thelma. It's simplicity and beauty makes this the perfect beanie in any colour or weight, however I would suggest 4ply held double or 10ply yarn as it would hold the pattern much better than just 8ply. I knited mine with Patons Jet (30% Alpaca/70% Wool) in #8, I call it autumn as it is varigated in the most beautiful reds, purples, browns, pinks and oranges.

Yep this pattern is a keeper!


Its amazing how difference 2 skeins of the same dyelot can be! As you can see the first ball produced more obvious brown and reddish striping while the other was more mixed more distinction between the colours. It looks better on because the stripes seem to fade/blend out so I'm glad it worked out cos I absolutely love the colours!

Friday, March 18, 2011

Cool Cupcakes!

I've swapped the yarn and knitting needles for an apron and a whisk, a much needed break for my poor sore wrists! But what should I bake I thought to myself...then it hit me CUPCAKES! Who doesn't love them? With their huge variety and crazy appearances, it is sure to be a crowd pleaser for any occasion.


First off "Rainbow Cupcakes" - A light, fluffy and buttery cake with psychedelic colours on the inside, you can put as many or as little colours as you would like. But the fun part is not knowing what you're going to see on the inside, mine swirled around. The cool thing about these cupcakes is that if you use white cupcake liners you can see the rainbow stripes!


And since it was St Patricks Day...

I tried to pipe a cloud on top of it!
Wish I had a shamrock sprinkles :(

On Sunday a couple of work mates are having a house cooling off bbq/party, so today I did a different sort of cupcake...

A Cheeseburger Cupcake!

A cute little cheeseburger made of a vanilla cupcake bun and a chocolate muffin patty. Now I tried to cheat and used cheap homebrand chocolate muffin mix and...it tastes erm...SALTY? salty chocolate? also it was sticky and goopy. It's eatable but thank goodness for homemade vanilla cupcake batter and icing! It also didn't spread very well or rise all that much but it really does look like a meat patty. I used a ribbon nozzle to pipe the "cheese", half crimped moon shaped nozzle for the "lettuce" and dribbled the "ketchup" with a spoon. I made frosting for the cheese and lettuce but mixed a runny royal icing for the ketchup - it really looked like ketchup the way it dripped down the sides.
When it hardened I put them into muffin cases, brushed a little sugar syrup on the top and sprinkled the sesame seeds on to the "bun".


 I'm not sure what I'll bake next but for now I might give everyone time to walk off the calories!

Saturday, February 26, 2011

Wednesday, February 23, 2011

The most confusing but simple pattern for bunny "booties"


 They aren't really booties more like slippers with a strap, so if you're making for a small baby then make a cuff instead of a strap. This is the original pattern Checkheatons Knitted Bunny Booties. as seen in the Australian Women's Weekly.

And here is the pattern interpreted by me row by row, with some modifications.

Sport weight yarn 1 50g ball in MC and 1 50g ball in CC, although I used a scrap ball less than 50g knitted double and still had a bit leftover. This project is a good scrap buster esp for the CC so don't go out and buy yarn for the project unless you really need too!

3.25mm needles (doesn't matter what type as you are knitting flat), a tapestry needle, yarn or embroidery thread for detail.

Sizes: 3 months (to fit boot length approx 8cm); 6 months (to fit foot length approx 9.5cm) in parenthesis.
Tension

25sts x 50rows in 10cm garter st
28st x 36rows in 10cm stocking st

*Note where I don't write a row or there is no instructions just work in the specified st over all sts
Garter st - Knit all rows
Stocking st - Knit RS rows, Purl WS rows


shoe before sewing seams

Make 2, Beginning at sole.
With main colour cast on 13 (17) sts.
Working in garter st
Row 1 (WS)
Row 2 (RS)
Rows 3,5,7,9 increase 1st each end...21 (25)sts.
Rows 10-12
Row 13 inc 1st each end....23 (27)sts
Rows 14-16
Row 17 decrease 1st at each end...21 (25)sts
Rows 18-20
Rows 21,23,25,27 dec 1st at each side...13 (17)sts
Row 28 (RS) knit
Row 29 (WS) Knit

Shape Heel
Row 30 Cast on 7sts *Do this by looping the working yarn around the needle* then knit the 7sts and sts to end...20 (24)sts
Row 31 (WS) Knit - We are still working the garter pattern!
Row 30,32,34,36,38,40 inc 1st on the toe edge ( it is the left right-side edge - the edge we didn't cast on the new sts)...26 (30) sts.
Row 41 (WS) Knit

Ankle
Row 42 Cast off 14 (16) sts, knit to end…12 (14) sts

Instep
Rows 43-49 work stocking st
*note it says to tie markers to mark ear positions here but it's unnecessary tell you why later.
Rows 50- 57 work stocking st

Other side of Ankle - We are going to work in Garter st again!
Row 58 Cast on 14 (16)sts - in the same method as before, then knit over til end...26 (30) sts
Row 59 (WS) Knit
Row 60, 62, 64, 66, 68, 70 dec 1 st on the toe edge (again this is the side we did not cast on new sts)....20 (24)sts
Row 71 (WS) Knit
Cast off LOOSELY!

At this point I like to sew up my bootie


Ears
Start with the outter ear in MC

Mark the centre of the instep, count 8 sts from the outter edge to the middle (I do this so the ears are the same distance from the middle), then pick up the 8sts going right to left.

Row 1(RS) Knit
Rows 2-4 work in stocking st.
Beg shaping:
Row 5 K2, inc in next st, K2..10sts. *inc by knitting f&b
Even Rows Purl.
Row 7 K2, inc in next st K4, inc in nest st, K2…12sts.
Row 9 Knit.
Row 11 K1, sl 1, K1, psso, K6, K2tog, K1….10 sts.
Row 13 K1, sl 1, K1, psso, K4, K2tog, K1….8sts.
Row 15 K1, sl 1, K1, psso, K2, K2tog, K1….6sts.
Row 16 (P2tog) 3 times.. 3sts.
Cut yarn and pull through remaining stitches.

3 months size before detailing.

For the Inner ear pick up 6sts with CC along the edge you picked up the sts for the outter ear. From right to left.
Row 1 (WS) purl
Rows 2-3 stocking st
Beg shaping:
Row 4 K2, inc in next st, K2..8sts. *inc by knitting f&b
odd Rows Purl.
Row 6 K2, inc in next st K2, inc in nest st, K2…10sts.
Row 8 Knit.
Row 12 K1, sl 1, K1, psso, K4, K2tog, K1….8 sts.
Row 14 K1, sl 1, K1, psso, K2, K2tog, K1….6sts.
Row 15 (P2tog) 3 times.. 3sts.
Cut yarn leaving a tail for sewing up ear, pull through stitches. sew edges of ears together. tie off and using a crochet pull the ends into the ears - to neaten up hang threads :)
emboider the bunnys face on and voila you are done!

This is my mouse variation.

For the mouse variation skip only purl one row on the wrongside before starting the inc and dec. Thread through some yarn at the back and plait it.